
How to Replace the Battery in NanoFoamer GO
How to Replace the Battery in NanoFoamer GO
If your NanoFoamer GO is losing power or no longer holding a charge, replacing the internal rechargeable battery can help restore performance. This guide walks you through the process using the product images as a reference.
Before You Begin
Make sure the device is turned off.
Work on a clean, dry surface.
Use a battery that matches the original specification.
Take note of the polarity orientation before removing the old battery.
Step 1: Unscrew the End Cap
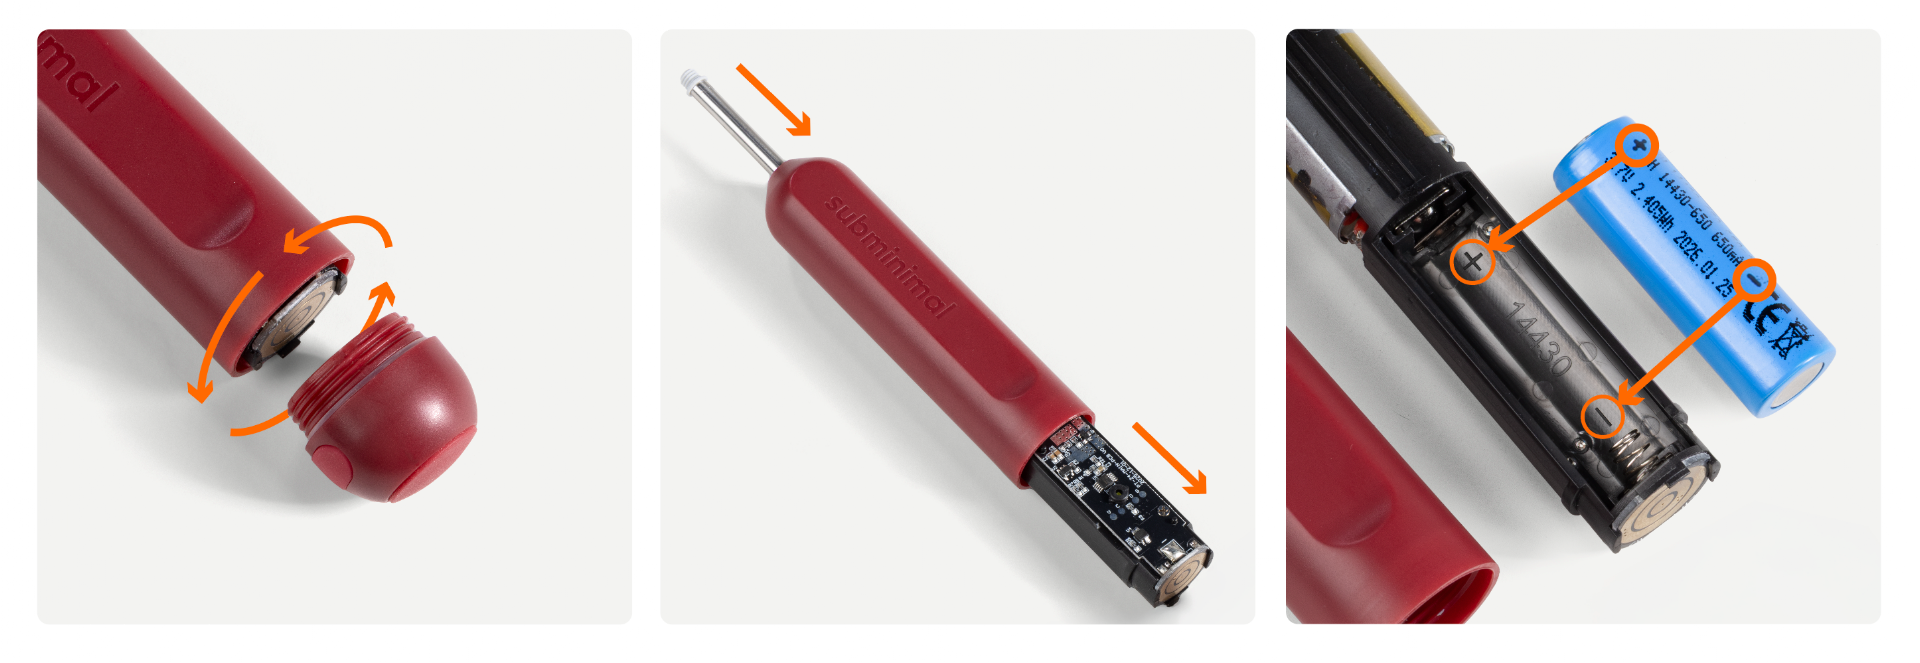
Rotate the bottom cap counterclockwise to unscrew it. This opens the end of the NanoFoamer GO and gives you access to the internal battery compartment.
As shown in the first image, the cap separates from the body after a few turns.
Step 2: Remove the Battery Housing
Once the cap is removed, gently slide the internal battery tube assembly out of the body of the frother.
The second image shows the inner electronics and battery housing partially removed from the red outer shell.
Step 3: Replace the Battery
Carefully remove the old rechargeable battery from the housing.
Insert the new battery in the same orientation as the original. Pay close attention to the positive (+) and negative (-) ends, as shown in the third image. Correct polarity is important for proper operation and to avoid damage.
Step 4: Reassemble the Device
Slide the battery housing back into the frother body.
Then screw the red end cap back on securely, but do not overtighten it. The device should fit together smoothly and remain firmly closed.
Helpful Tips
If the battery does not slide in easily, double-check the orientation.
Inspect the compartment for dust or debris before reassembly.
If your device still does not power on after battery replacement, confirm the battery is charged and installed correctly.